In this post, I'll show you how to run multiple React Native apps on different emulators with different ports on macOS.
Getting Started
Start your emulators (Android)
You can start two android emulators from Android Studio. You can run the following command to check the list of available emulators:
$ adb devices
List of devices attached
emulator-5554 device
emulator-5556 device
CLI
The fastest way is to use CLI npx react-native run-android --deviceId=emulator-5556 --port=8088 to run the React Native app on a specific emulator with a specific port. But this method might not work on debugging with VSCode.
VSCode configuration
First, you need to install React Native Tools extension in VSCode. Then, you create a settings.json file inside the .vscode folder of each project. The settings.json file should look like this:
{
  // Change to your desired port. Default is 8081
  "react-native.packager.port": 8088
}
Open either one of your React Native projects in VSCode. Create launch.json file inside the .vscode folder. The launch.json file should look like this:
{
  "version": "0.2.0",
  "configurations": [
    // ... other configurations
    {
        "name": "Debug Android Hermes",
        "cwd": "${workspaceFolder}",
        "type": "reactnativedirect",
        "request": "launch",
        "platform": "android",
        "port": 8088, // Change to your desired attach port. Default is 8081
        "target": "emulator-5556" // Change to your desired emulator
    },
  ]
}
Here's a brief explanation of the configurations:
settings.jsonreact-native.packager.port: This is the port that the metro bundler will run on. You can change this to any port you want.
launch.jsonport: This is the port that VSCode will connect to the metro bundler. Not the app itself. You must make sure the port always matches the port in thesettings.jsonfile.
Run the react native application
When you run the React Native app using VSCode, the output will be something like this:
# ... other logs
                        ▒▒▓▓▓▓▒▒
                     ▒▓▓▓▒▒░░▒▒▓▓▓▒
                  ▒▓▓▓▓░░░▒▒▒▒░░░▓▓▓▓▒
                 ▓▓▒▒▒▓▓▓▓▓▓▓▓▓▓▓▓▒▒▒▓▓
                 ▓▓░░░░░▒▓▓▓▓▓▓▒░░░░░▓▓
                 ▓▓░░▓▓▒░░░▒▒░░░▒▓▒░░▓▓
                 ▓▓░░▓▓▓▓▓▒▒▒▒▓▓▓▓▒░░▓▓
                 ▓▓░░▓▓▓▓▓▓▓▓▓▓▓▓▓▒░░▓▓
                 ▓▓▒░░▒▒▓▓▓▓▓▓▓▓▒░░░▒▓▓
                  ▒▓▓▓▒░░░▒▓▓▒░░░▒▓▓▓▒
                     ▒▓▓▓▒░░░░▒▓▓▓▒
                        ▒▒▓▓▓▓▒▒


                Welcome to Metro v0.76.8
              Fast - Scalable - Integrated


[Info] Packager started.

[Info] Prewarming bundle cache. This may take a while ...

[Info] About to get: http://localhost:8088/index.bundle?platform=android
# ... other logs
You will notice that the metro bundler is running on port 8088 or the port you specified in the launch.json file, and VSCode will connect to the emulator emulator-5556. But we are not done yet.
Android Emulator Configuration
By default, react native will always try to connect metro server with port 8081. And you might notice that your react native application will throw an error like Unable to load script. Make sure you're either running Metro (run 'react-native start') or that your bundle 'index.android.bundle' is packaged correctly for release..
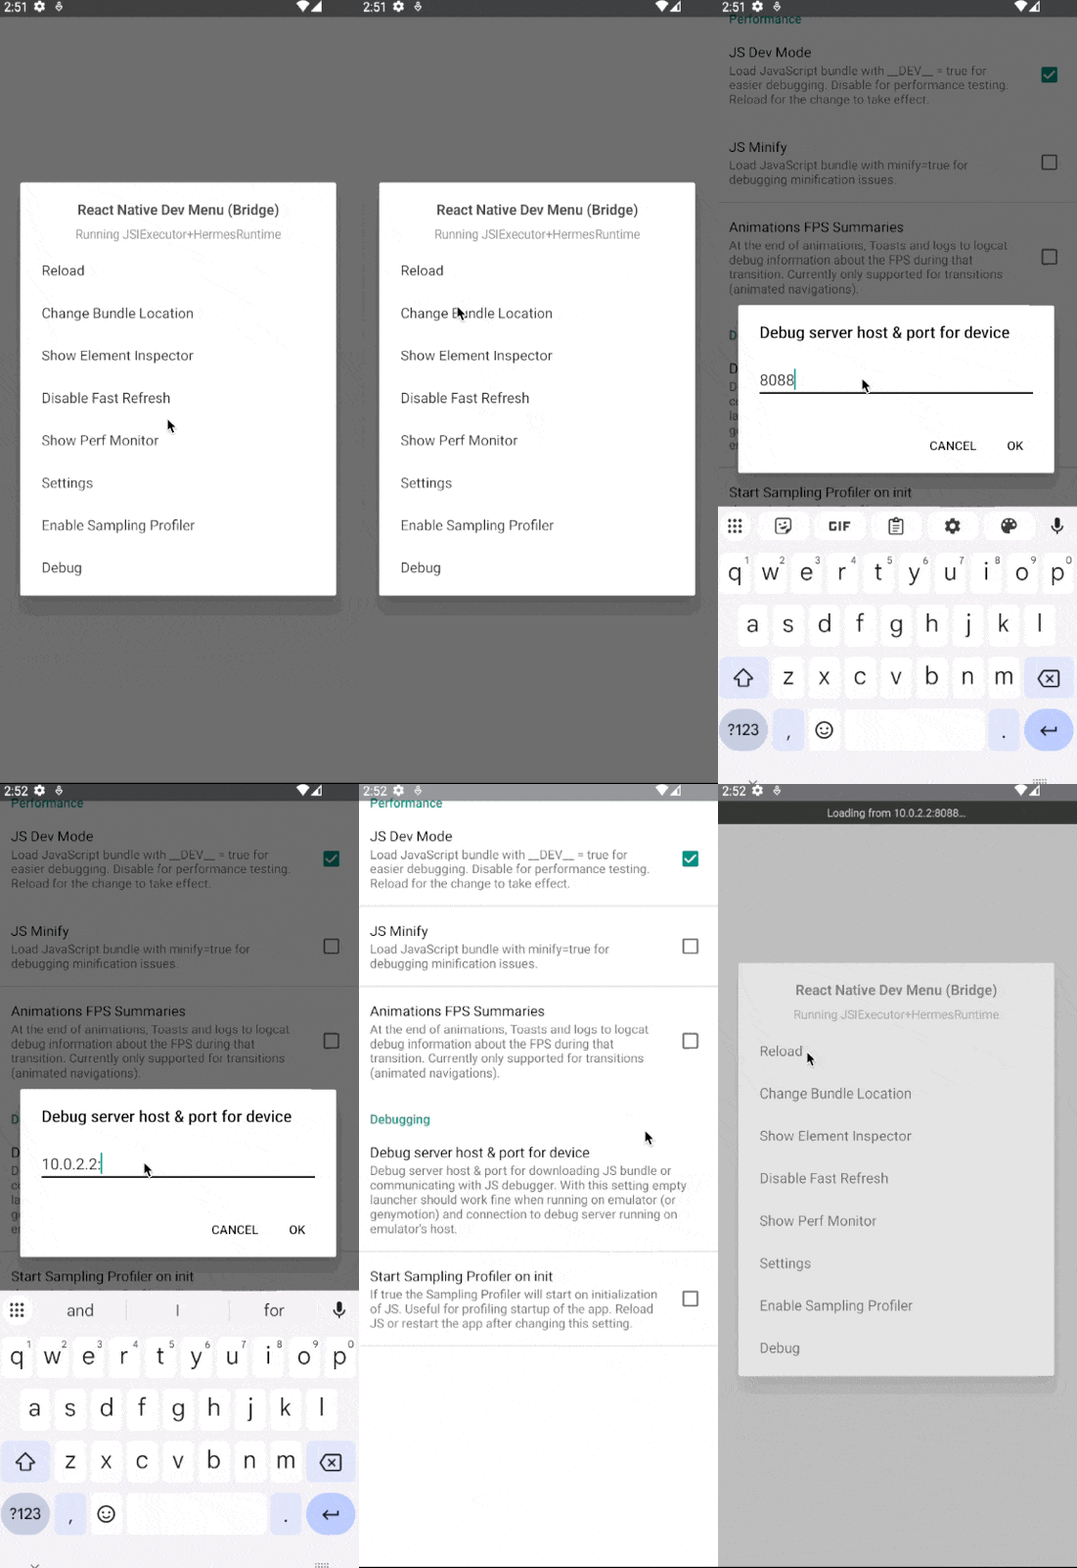
Therefore, you need to configure manually with "CMD + M" > Dev settings > Debug server host & port for device and set the value to 10.0.2.2:8088 inside the emulator. To understand more about android emulator networking, you can check here.

PS: I tried both adb reverse and configuring metro.config.js to run on port 8088, but neither worked.
IOS Simulator
For IOS simulator, I didn't test it yet. But the settings.json should remains the same as the android configurations. And the launch.json file should look like this:
{
  "version": "0.2.0",
  "configurations": [
    // ... other configurations
    {
        "name": "Debug iOS Hermes",
        "cwd": "${workspaceFolder}",
        "type": "reactnativedirect",
        "request": "launch",
        "platform": "ios",
        "port": 8088, // Change to your desired attach port. Default is 8081
        "target": "iPhone 12" // Change to your desired simulator
    },
  ]
}
After that, you need to search RCT_METRO_PORT:=8081 in ios directory of your project and change it to RCT_METRO_PORT:=8088.
Conclusion
Now you can run multiple React Native apps simultaneously on different emulators with separate ports on macOS. Thanks for reading, and I hope you found this tutorial helpful.